Chocolate Buckwheat Brownie Recipe

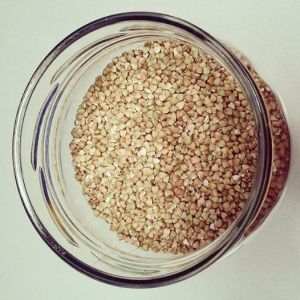
This week I realised that I still had 1 kilo of Loving Earth Buckinis to start using up. They had somehow made their way to the back of the cupboard and the back of my mind. I started sprinkling them on everything, but decided that I wanted to use them to make a buckwheat flour using my Thermomix and incorporate that into a chocolate brownie recipe. Find the recipe below 🙂

Loving Earth BuckinisChocolate Buckwheat BrowniesChocolate Buckwheat Brownie Recipe – Gluten Free

Ingredients

80g Buckinis
100g Dark Chocolate 70% (roughly chopped)150g Butter
150g Coconut Sugar
4 Eggs
1tsp Vanilla Extract
1tsp Brewed Coffee (or 1/4tsp of instant coffee granules)
Pinch of sea salt
40g Raw Cacao
1/2tsp Gluten Free Baking Powder

Method

Preheat oven to 180 degrees celcius. Grease and line a 20cm x 20cm square tin.

Grind 80g buckinis for 40 seconds/Speed 9. Set aside.

Melt butter and chopped chocolate together at 50 degrees/4 mins/Speed 2 or until melted.

Add sugar and mix for 5 seconds/Speed 3.

Add eggs one at a time whilst the Thermomix is running on Speed 3/20 seconds.

Add vanilla extract and coffee for 40 seconds/Speed 3. Scrape down the sides.

Add the remaining dry ingredients and mix for 10 seconds/Speed 5.

Pour into the prepared tin and bake in the preheated oven for 20-25 minutes or until cooked through.


Do you have any recipes to help me use up my Buckinis?

Almost 101 uses for the Thermomat

Here are some tips for using your Thermomat (other than just rising dough) from some fellow consultants:

From Trudie –

  • Tempering chocolate, well setting it. 
  • Blind baking, place over the pie and place pie weights on top 
  • Rolling brandy snaps
  • Rolling a Swiss roll (the cake with cream that you roll up)
  • Sushi roll (I think there’s a theme)
  • May stop a rug from moving if placed under

From Laura –

  • rising bread
  • baking on
  • using as a pastry board – working with scones, sugar cookies etc
  • you can roll your dough into a long baguette shape and wrap the mat around it to bake in oven as baguette
  • If using on smaller trays when baking, just fold in half 

From Bev –

  • Work surface for preparation of food – pastries, bread/pizza dough, cookies, meat loaf (no mess over kitchen bench)
  • Baking – you can bake anything on a Thermomat – pastries, bread, pizza, cookies, meat, chicken, fish, roasted vegetables, candy (peanut brittle, glass candy) frozen foods (turns any pan into a non-stick surface) One more –  restaurant parmesan cups – baking circles of grated parmesan cheese, lift and mould over a small ramekin, sit in a larger ramekin – perfect!
  • Proving dough – contains heat within mat allowing for successful proving
  • Even cooking from top to bottom, no burning or scorching.
  • Health benefit – less fat in food as doesn’t require grease or oil to create a non-stick coating
  • Saves time – preparation to bake is quick and easy, less time preparing roasting pan and cleaning mess on bench
  • Saves money – less use of aluminium foil, oil, spray, parchment/baking paper, cleaning and scrubbing products (for dirty baking pans)
  • Reusable 1000’s of times!!
  • Measurements on sides – useful for measuring food AND cake tin size

From Kylie –

  • Sweat the skins off roasted capsicum
  • Roll meatloaf into nice shape before placing in varoma


Do you have ideas for some other uses that aren’t listed here? Add them in the comments below 🙂

Ginger Ice Cream with a Rhubarb Swirl Recipe

Ginger Ice Cream with Rhubarb Swirl Recipe

Winter is now upon us down here in Australia and with that comes Rhubarb season! Here is a recipe that incorporates a Rhubarb jam through a fresh ginger ice cream. You will need to begin this recipe the day before you need it.

Ginger Ice Cream with Rhubarb Swirl Recipe

Makes approximately 1 litre

Ginger Ice Cream Ingredients:

150g raw sugar
50g fresh ginger knob (washed)
500g pure cream
250g full cream milk
2 whole eggs
3 egg yolks

Rhubarb Jam Ingredients:

370g rhubarb (washed & roughly chopped)
100g sugar
100g fresh orange juice (approximately 1 orange)

Thermomix Method:

1. Place the 150g sugar into the bowl and grind on Speed 9 for 10 secs. Set aside.

2. Add the knob of ginger and chop on Speed 5 for 2 seconds. Scrape down the sides.

3. Add the cream and milk. Cook for 7 minutes at 80 degrees on Speed 2. Set aside for 30 minutes to allow the ginger to infuse.

4. Add the sugar back into the cream, milk and ginger mixture. Add the eggs and cook for another 7 minutes on Speed 4.

5. Strain through a fine mesh sieve to remove the ginger chunks. Place the custard into a metal tin/bowl and allow to cool slightly before placing it into the freezer for 3-4 hours.

6. Begin making the Rhubarb jam. Add the Rhubarb, sugar and orange juice to the TM bowl and cook for 3o minutes on Varoma on Speed 1. Use the rice basket instead of the MC to allow the jam to reduce easier.

7. Puree the jam on Speed 5 for 20 seconds. Allow to cool slightly and then place in the fridge to cool completely. It is important that this jam is cold when you try and swirl it through your ice cream mixture.

8. Chop the ice cream mixture into smaller chunks and place it back into the Thermomix and churn for 1 minute on Speed 9. Return to the freezer for another half hour before you put the swirl through.

9. Place dollops of your Rhubarb jam onto the top of your ginger ice cream. Use a knife to gently swirl the jam through. Place back into the freezer and leave to set overnight.

Remove the ice cream from the freezer appoximately 10 minutes before serving to soften the mixture and make it easier to scoop.

Goes perfect with apple crumble! Enjoy!

You can also find this recipe on the Thermomix Recipe Community.

What is your favourite flavour ice cream? Have you attempted making real ice cream with the Thermomix?

Blueberry Frozen Yoghurt Recipe

I recently had a bad batch of homemade yoghurt that hadn’t quite set, so instead of throwing it away, I decided to freeze it. And what else was I going to do with yoghurt that was frozen? Make Frozen Yoghurt of course! This comes out like a soft serve consistency. Enjoy!

 Blueberry Frozen Yoghurt Recipe

Ingredients

500 grams vanilla yoghurt frozen into ice cubes
100 grams Frozen Blueberries
50 grams Pure Maple Syrup
1 Egg white (optional)

Preparation

1. Add  250g of frozen yoghurt ice cubes plus the remaining ingredients to the Thermomix bowl.

2. Process for 20 seconds on Speed 9. Use the spatula if you need to help move the mixture.

3. Add the remaining 250g of frozen yoghurt ice cubes to the bowl and process for 1 minute on Speed 10.

Serve immediately.

Tip

If you are using Natural Yoghurt that hasn’t already been sweetened you may want to increase your maple syrup or add 50 grams of raw sugar & process it to icing sugar at the beginning.

Image

Buckwheat & Spelt blender pancakes

Our new little family member arrived last week! Woo hoo! It has been a pretty busy week, just “getting to know” the machine. Trialling dishes out of the Everyday Cookbook & getting finalising my training as a Thermomix Consultant.

I had my first demo yesterday, and had a little boo-boo where I forgot to put the temperature on to cook the risotto! We just had to turn the temp on and repeat the process. The dish was saved & I was lucky that I was amongst forgiving friends!

Sundays are often pancake day in our household. We usually keep it simple with Miss almost 5, just likes maple syrup. I like to pop frozen blueberries on the top while the pancake is cooking, then flip it. They have defrosted by the time you serve up.

Here is a recipe inspired by Raven on the Recipe Community:

Buckwheat & Spelt blender pancakes

Ingredients

200 grams wholemeal spelt flour
150 grams buckwheat flour (you could make your own) 2 teaspoons baking powder
1 teaspoon salt
1 tablespoon rapadura
1 egg
500 grams milk (your choice)
3 tablespoons butter

Preparation


1.Add all ingredients (except for the butter) into thermomix bowl.

2.Mix for 10 seconds on speed six. Check batter has been mixed in, if not mix for another 5 seconds.

3.Turn on stove and place a fry pan on there. Add some butter and let it melt.

4.Pour out from the thermomix bowl. Once the pancake starts to bubble, flip it over with a spatula.


Out with the old

image

A lot of people sell off their old appliances to help fund their Thermomix. I, on the other hand having been just getting by with a hand me down food processor & a $50 blender. I plan on keeping the blender for those “just in case” moments. I’m not sure I could go a day without a green smoothie!

Hopefully, my new machine should arrive this week. It had been a long 3 year wait for this.

What am I even going to cook first?